
Export Step
This section describes how to add and set up the connection for the Export step applicable to the tasks in the interface. For more information about steps, see Defining Steps
The Export step allows exporting entities from IConduct to Panaya platform. To create the Export step, navigate to Interfaces> {Specific Interface}> Tasks> {Specific Task}> Steps >New >New Export Step.
To export your data, follow the steps below:
- Select the target connection from the Connection drop-down list. Click Open for your reference, or if modifications or any changes are required in the pre-defined connection.
Warning: If you can't find the necessary Connection in the list, go to the connection page and make sure the Is Active and Is Target checkboxes are enabled.
- Select the target entity from the Entity Name drop-down list. The list of supported entities is the same as in the Import step.
- Using the Action drop-down list, choose the action you want to perform.
- Insert: Put data into the schema.
- Update: Add the latest data to the existing schema fields.
- Delete: Delete data from the schema.
Note: On selecting Delete, Update from the drop-down list, the Schema Column and Source Column appear. These fields associate a specific field in the source system to a specific field in the Schema. The rows from the source system will Delete or Update rows in the Schema based on this association. Select required columns to enable automatic updates.
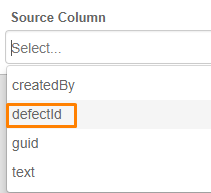
For the Update action, the ‘Schema Column’ should be filled with the ids relevant to the entity. For example, if you have the DefectComments entity, choose the ‘DefectId’ column.
Creating the Export Step